In this section, under the Parent publishers tab, you will find the list of networks that have sent invitations and want to connect with you or are already connected.

To approve the connection, you should click on the network, and in the window that opens with information about the connection, you should click Accept:

Tip: In Multiple Customer Management, you can have up to 15 networks in Manage Inventory (MI) and only one in Manage Account (MA) model, provided that the managed inventories (ad units) are different. It is not allowed to have multiple requests to Google in one impression, both for more than one Ad Exchange network and for Ad Exchange and Adsense requests.
Google’s demand is the same, so think carefully before connecting multiple partners, as it requires control and management of these connections, and may not necessarily represent an increase in fill rate or revenue of your inventory.
Enabling Ad Exchange
Disabling Adsense
To enable Ad Exchange, first, you’ll need to disable Adsense. Go to Inventory > Network settings:
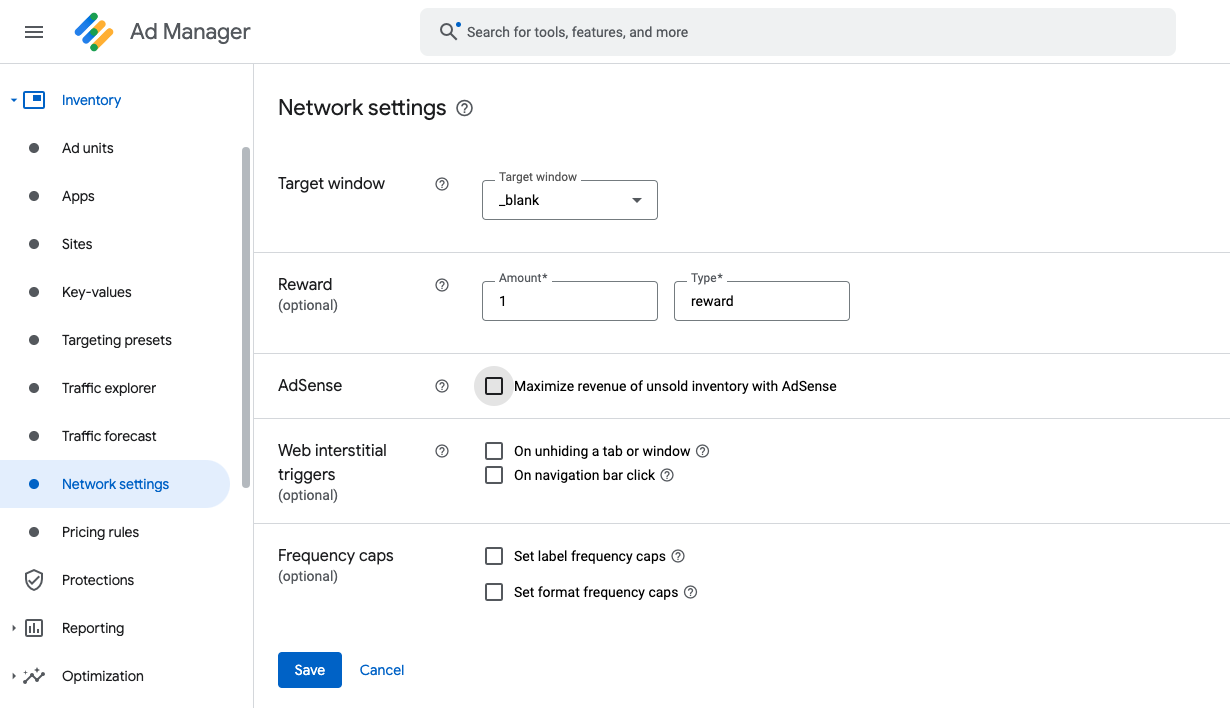
Uncheck the option Maximize revenue from unsold inventory with Google AdSense and click Save.
Setting Ad Exchange
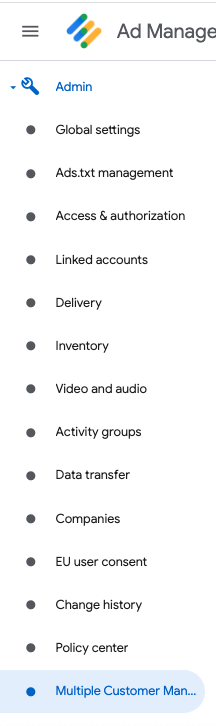
After disabling Adsense, go to Multiple Customer Management and click on the Ad Exchange tab (If the tab does not appear, reload the page) :

In this tab, the first item is the acceptance of Ad Exchange terms; after accepting the terms, you will be directed to the second item:
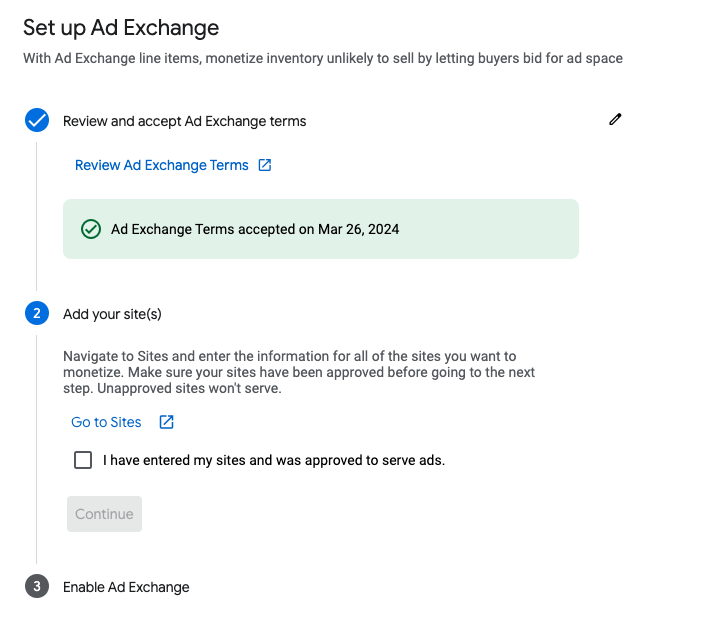
You can access it through the link or directly through the Inventory > Sites menu.
Click on New site:
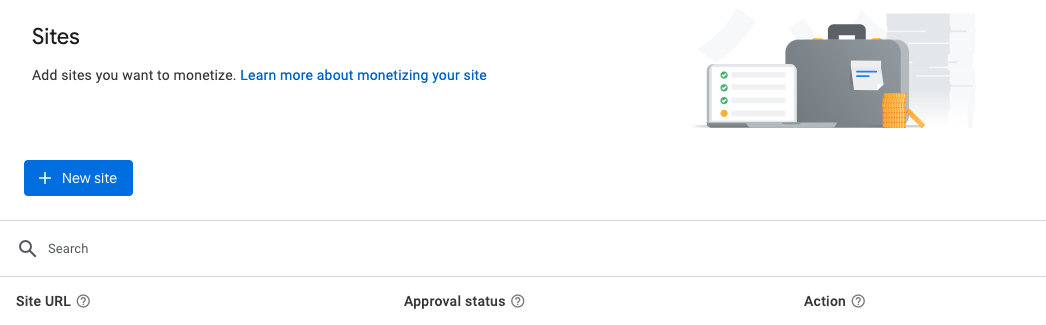
You should add the URL without the www and without the http or https protocols as shown in the examples below: example.com, example.com.br or example.net.
Click Save. On the next page, you should copy the provided line and add it to your ads.txt file. Once done, check the option I’ve published the ads.txt file and click Done.

You can close the next window:

Important: Google may take up to two weeks to approve your URL, so please be patient 🙂
The last step is to activate Ad Exchange:

With the site approved and Ad Exchange activated, you are ready to configure the Ad Exchange order and start your monetization.
Order
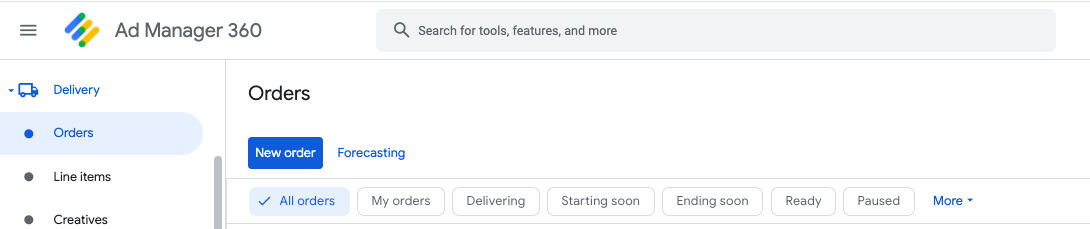
In Delivery > Orders, click on New order:
Fill in the Name (use a name that facilitates the identification of the Ad Exchange order) and advertiser fields (you’ll need to create one if you haven’t already registered Google):

To create a new advertiser, in the advertiser field, click on the drop-down list in Add a new company, on the next screen, select in the type field, Advertising Network, and in the name field Google, click Save:

You will be directed to the previous screen (New order), click Add line item.
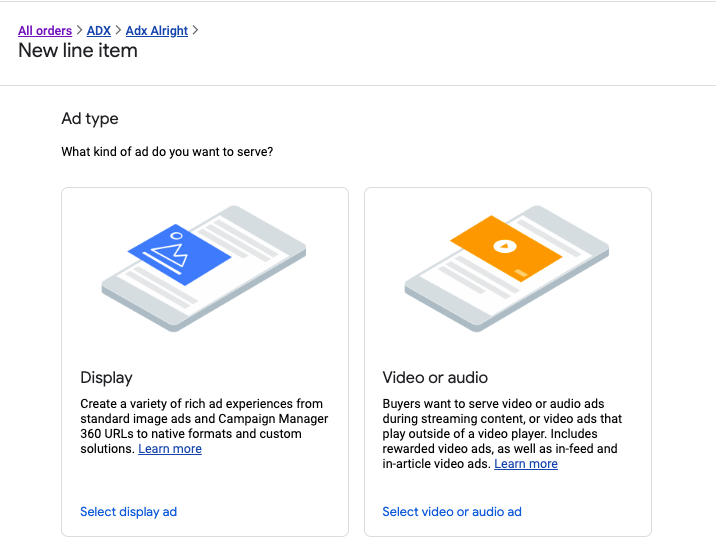
Line Item
Click Select display ad:
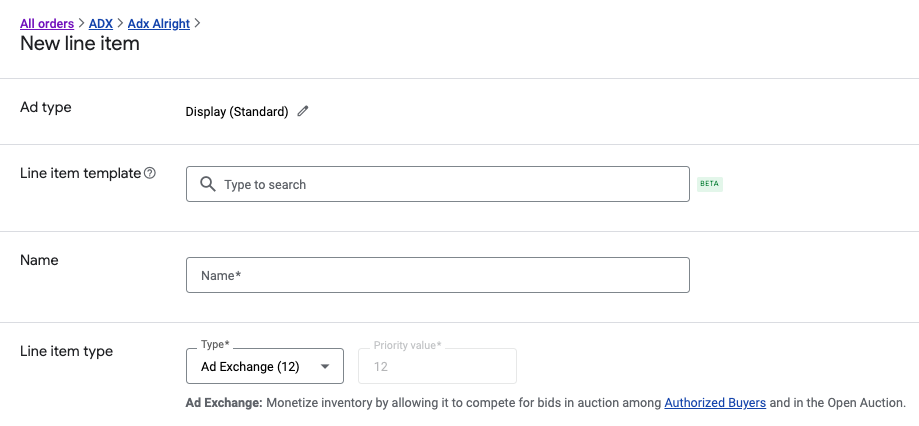
On the next screen, fill in the Name field (e.g., Ad exchange display) and select Ad Exchange(12) from the drop-down menu in the Line item type field:
In the Expected creatives field, activate All requested sizes:

In Advanced Settings, select the Web Property Alias from the dropdown menu, choose the Self-service AdX Display property:
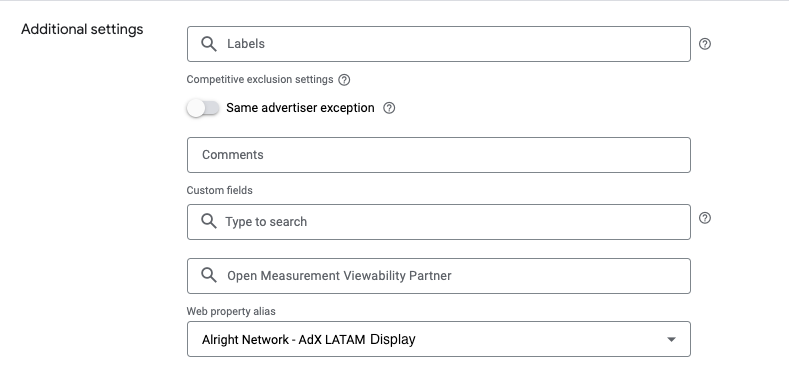
In Display settings, select the Start time, Immediately, and in the End time, Unlimited from the drop-down menus:

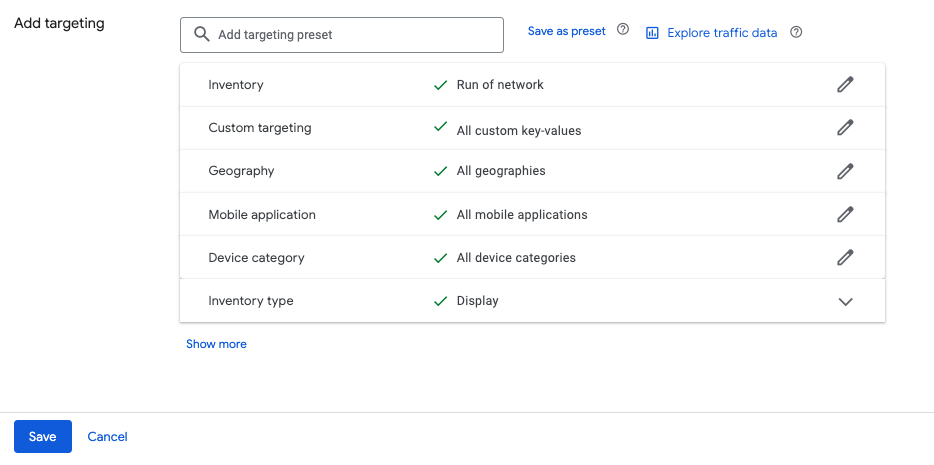
In Add targeting, you can leave the default configuration or select the inventory where you want to monetize with Ad Exchange. Click Save.
Ad Exchange Creatives
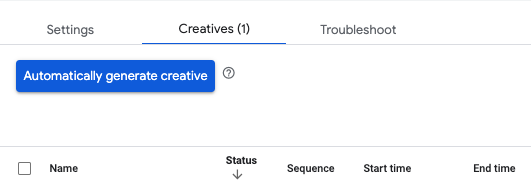
Select the Creatives tab and click Generate creative automatically:
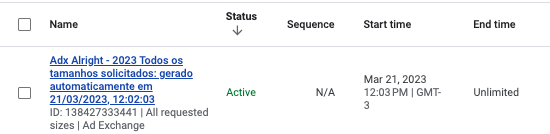
The creative has been generated:
Approving the Ad Exchange order
Select the Ad Exchange order, check the checkbox of the Ad Exchange line item, and click Approve:

Your order is now approved and ready to serve ads.
Ad Units
Now that your site is approved and your Ad Exchange order is ready, it’s time to map the positions and sizes you will implement on your site. Below is a list of the most used IAB formats and devices:
- Desktop
- 970×250
- 970×90
- 728×90
- 300×600
- 120×600
- 160×600
- Mobile
- 320×100
- 320×50
- 300×100
- 300×50
- Desktop e Mobile
- 300×250
- 320×250
- 336×280
- fluid (flexível)
These are the sizes with the highest demand, ideal for monetization with Ad Exchange. For your direct sales, you can use custom sizes, but ideally, the same unit used for your direct advertisers should also serve programmatically when you don’t have an active campaign for it. This saves time and avoids unfilled impressions on your site. So, analyze carefully how your inventory will be configured.
Creating the ad unit in Ad Manager
In Inventory > Ad units, click New ad unit:

Fill in the Ad unit name field, the Sizes you want to use in this space, and click Save:

Tip:
- If you have more than one URL, you can create a parent ad unit for each URL and add child units within each parent unit to organize your inventory.
- For interstitial and reward formats, you should select the _top targeting window.

Single ad unit
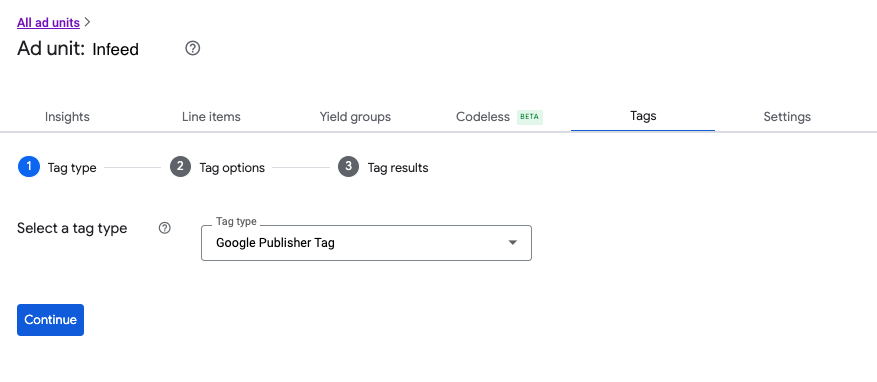
Click on the ad unit you want to generate the tag for, select the Tags tab, choose Google Publisher Tag as the tag type, and click Continue:
In the tag options, disable the Enable single request option, choose the size, and click Continue:
The result will be this:

Note: The second part of the code should be placed where the ad unit should load.
Multiple ad units
These are the same steps as above, but in the Tag options, enable Single request:

When implementing multiple units, it is important to note that the gpt.js implementation should be loaded only once per page:
Created with the sample-builder: https://developers.google.com/publisher-tag/sample-builder
It is important to observe the implementation for mobile and desktop devices. Desktop sizes should not be requested on mobile, as they interfere with the user experience, covering content, thus violating Google’s policies. If you want to make unique implementations for desktop and mobile, use sizes compatible with both devices, for example, 300×250; otherwise, separate implementations of these blocks will be necessary, or validate for desktop and mobile.
For implementation of other formats, please refer to the documentation below:
https://developers.google.com/publisher-tag/samples
Ad unit for AMP pages
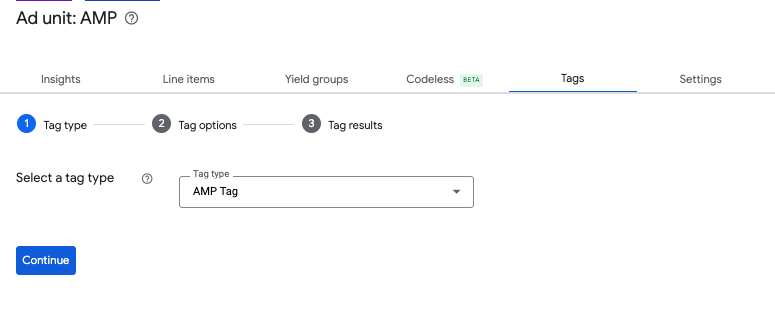
Click on the ad unit you want to generate the tag for, select the Tags tab, choose AMP Tag as the tag type, and click Continue:
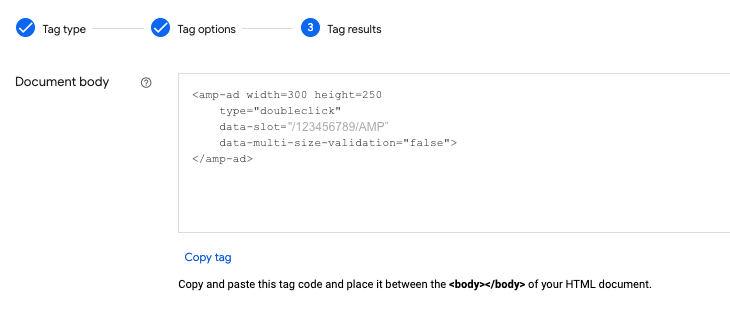
 In the tag options, enable the option Enable validation for multiple sizes if you want to deliver more than one size in the space; otherwise, disable the option. Select the sizes and click Continue:

Place the tag in the position where the format should load on the AMP page.
Remember that at any time, you can use the Google Ad Manager Help, or Google Developers Guide
For publishers, navigating the process of setting up an Ad Manager account is a critical step in unlocking the full potential of content monetisation. The guidelines presented in this comprehensive guide lay the groundwork for establishing a successful online advertising operation. Attention to detail and patience throughout the setup process are critical to ensure a smooth transition from initial configuration to optimising ad units for different content types. We encourage publishers to explore our certification at academy.alright.global to gain a deeper understanding of the dynamics of digital advertising. As the publishing world continues to evolve, staying on top of advertising strategies and technological advancements is critical. With the right expertise and tools, your journey to improved content monetisation is well underway.